How to Layout An ADA Aluminum Pipe Railing
This component system, easily assembled on-site, meets all ADA guidelines for structural strength and usability. An ADA IR85KA bracket can be rotated to any angle for stairs or ramps. Smooth, continuous top rail with required grip diameter has no sharp edges or projections.
Stainless steel and anodized aluminum provide long-term low maintenance. Wagner’s ADA systems can be easily updated or renovated.
Tools needed:
- Tape measure
- chalk line
- Portable chop saw (cut material square for best fit-up)
- 3/16″ Allen wrench
- 3/8″ ratchet
- Drill with #3 and 3/8″ drill bits—clear, plastic
- Urethane hammer
- Rivet nut tool
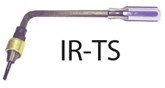
A rivet nut tool is required to fabricate Interna-Rail®. A wide range of these tools are available, with the IR-TS Rivet Nut Tool currently in stock. If you’re doing a large number of tee connections, you may want to consider a hydraulic rivet nut tool. Contact Wagner for more information.
Getting Familiar with Wagner’s ADA, Aluminum Pipe Railing System
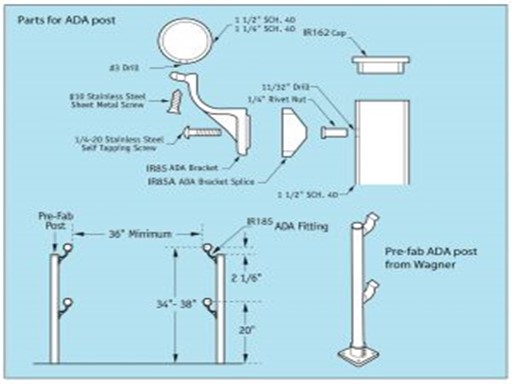
Getting familiar with the parts that you’ll be working with is very important. It will help you understand how each piece works together to become a standard section of an ADA handrail.
ADA posts purchased from Wagner will come pre-assembled, so less assembly is required. Shown here are the pieces that make up a standard ADA post.
How to Layout ADA Railings
- Review any project drawings noting the locations of railing ends and corners as well as any other critical post locations. Unless noted to the contrary, the dimensions on the drawings are to the centerline of the rail and posts.
- Snap chalk line as needed to determine the centerline of the railing.
- Locate and mark the center of an end post or corner post to mark the start of the railing installation.
How to Install ADA Railings
- Place each pre-assembled ADA post into position and secure it into place.
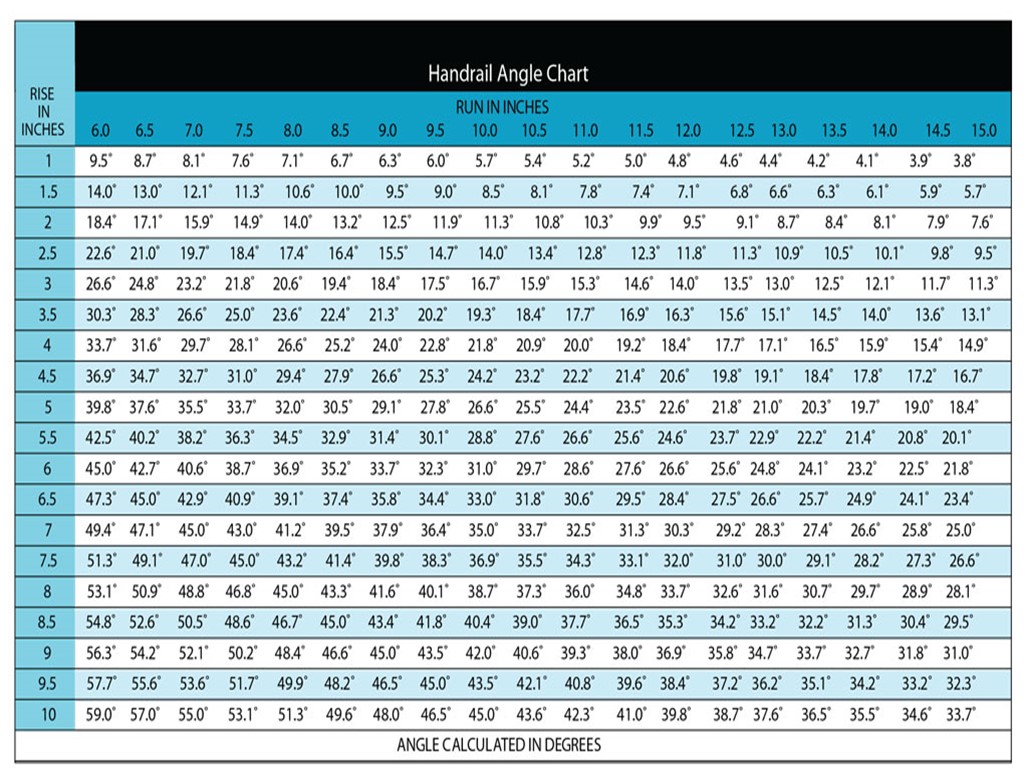
- To determine each of the angles of your ramps and/or your walking surfaces, refer to the Handrail Angle Chart below.
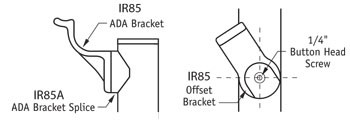
- Adjust the IR85 ADA brackets that are attached to the posts, to the degree that was found in the Handrail Angle Chart.
- Tighten the IR85 ADA brackets to the correct degree.
- Begin measuring your handrail cuts at a common corner.
6. To cut the handrail to the appropriate lengths, dimensions from each section of the ramp need to be determined. Follow the equations below to determine cut lengths. Note: both the top rail and midrail sections will be cut to the same lengths. Continue to cut the handrail for each individual area by measuring each surface area section. Note: Handrail may need to be modified in the field for any minor adjustments to cut lengths.

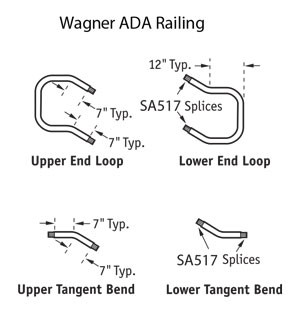
7. Test fit each handrail section and connect any fittings at the corners and ends.
8. Secure the handrail to the IR85 brackets by placing a mark on the underside of the handrail through each of the brackets to indicate where the holes need to be drilled.
9. Drill a #3 hole into each of the marked areas on the handrail.
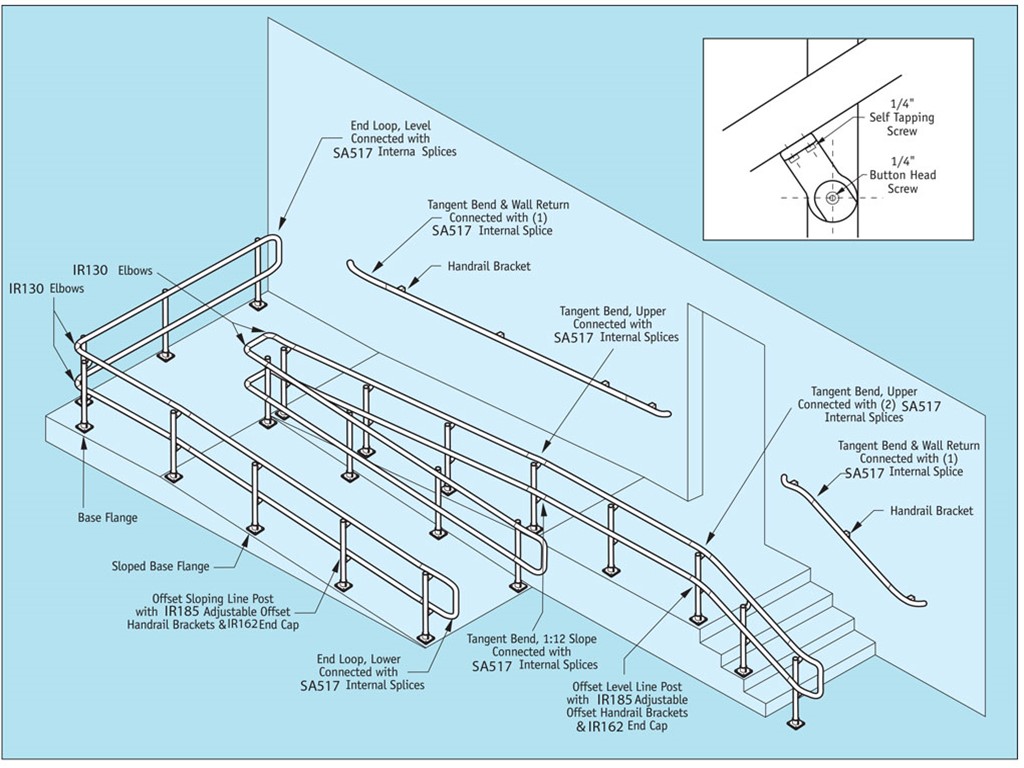
10. Secure the handrail to each of the IR85 brackets with the 1/4˝ self-tapping screws (see illustration below).
Note: Each end post will be located 12˝ from the centerline of the fitting/end loop at the end of the railing section.
Contact us for any questions regarding ADA handrail.